File locations

Before we continue it is good to get a bit of background information on which files you can expect to find at which part of the file system:

/The root directory, where everything begins.
/binContains binaries (programs) that must be present for the system to boot and run.
/bootContains the Linux kernel, initial RAM disk image (for drivers needed at boot time), and the boot loader. Interesting files include /boot/ grub/grub.conf, or menu.lst, which is used to configure the boot loader, and /boot/vmlinuz (or something similar), the Linux kernel.
/devThis is a special directory that contains device nodes. “Everything is a file” also applies to devices. Here is where the kernel maintains a list of all the devices it understands.
/etcThe /etc directory contains all the system-wide configuration files. It also contains a collection of shell scripts that start each of the system services at boot time. Everything in this directory should be readable text. While everything in /etc is interesting, here are some all-time
favorites: /etc/crontab, a file that defines when automated jobs will run; /etc/fstab, a table of storage devices and their associated mount points; and /etc/passwd, a list of the user accounts.
/homeIn normal configurations, each user is given a directory in /home. Ordinary users can write files only in their home directories. This limitation protects the system from errant user activity.
/libContains shared library files used by the core system programs. These are similar to dynamic link libraries (DLLs) in Windows.
/lost+foundEach formatted partition or device using a Linux file system, such as ext3, will have this directory. It is used in the case of a partial recovery from a file system corruption event. Unless something really bad has happened to your system, this directory will remain empty.
/mediaOn modern Linux systems, the /media directory will contain the mount points for removable media such as USB drives, CD-ROMs, and so on, that are mounted automatically at insertion.
/mntOn older Linux systems, the /mnt directory contains mount points for removable devices that have been mounted manually.
/optThe /opt directory is used to install “optional” software. This is mainly used to hold commercial software products that might be installed on the system.
/procThe /proc directory is special. It’s not a real file system in the sense of files stored on your hard drive. Rather, it is a virtual file system maintained by the Linux kernel. The “files” it contains are peepholes into the kernel itself. The files are readable and will give you a picture of how the kernel sees your computer.
/rootThis is the home directory for the root account.
/sbinThis directory contains “system” binaries. These are programs that perform vital system tasks that are generally reserved for the superuser.
/tmpThe /tmp directory is intended for the storage of temporary, transient files created by various programs. Some configurations cause this directory to be emptied each time the system is rebooted.
/usrThe /usr directory tree is likely the largest one on a Linux system. It contains all the programs and support files used by regular users.
/usr/bin/usr/bin contains the executable programs installed by your Linux distribution. It is not uncommon for this directory to hold thousands of programs.
/usr/libThe shared libraries for the programs in /usr/bin.
/usr/localThe /usr/local tree is where programs that are not included with your distribution but are intended for system-wide use are installed. Programs compiled from source code are normally installed in /usr/local/bin. On a newly installed Linux system, this tree exists, but it will be empty until the system administrator puts something in it.
/usr/sbinContains more system administration programs.
/usr/share/usr/share contains all the shared data used by programs in /usr/bin. This includes things such as default configuration files, icons, screen backgrounds, sound files, and so on.
/usr/share/docMost packages installed on the system will include some kind of documentation. In /usr/share/doc, we will find documentation files organized by package.
/varWith the exception of /tmp and /home, the directories we have looked at so far remain relatively static; that is, their contents don’t change. The /var directory tree is where data that is likely to change is stored. Various databases, spool files, user mail, and so forth, are located here.
/var/log/var/log contains log files, records of various system activity. These are important and should be monitored from time to time. The most useful ones are /var/log/messages and /var/log/syslog. Note that for security reasons on some systems, you must be the superuser to view log files.
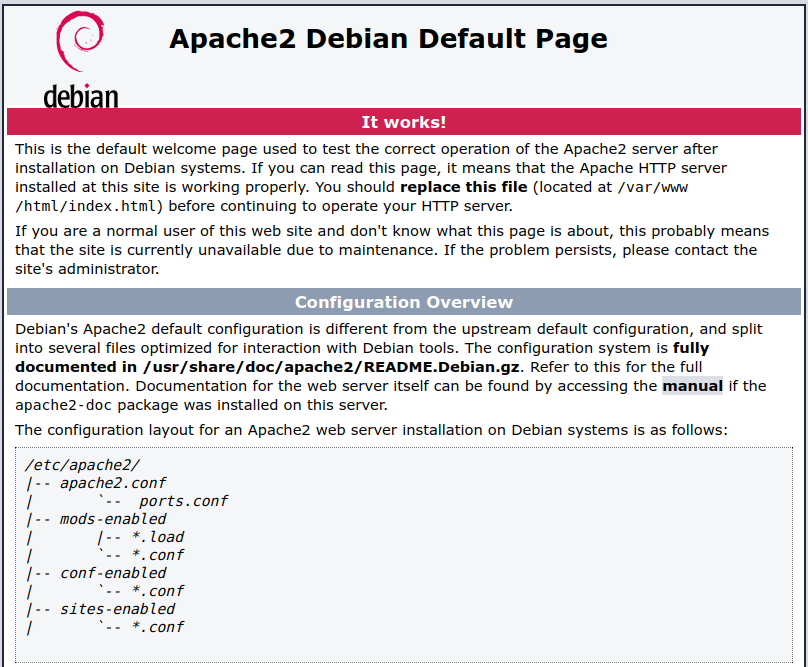
/var/wwwDefault location for webpages

(From The Linux Command Line, 2nd Edition by William Shotts.)

IP addresses

Networked computers communicate with each other through IP addresses. To avoid problems they have to be unique. You can compare an email address to a physical address (country.city.street.house number), but as computers in essence only understand binary number, so a 0 or a 1, the addresses are build up with zeros and ones.

An IPv4 address is basically an 32 bit address that for convenience is broken up in 4 groups of 8, (by eight, or byte). Binary works with level of two, that can be added. As in daily life we are used to the decimal system 0-9 these bytes can be converted to a decimal number according to the following table:

Power of 22726252423222120
Decimal1286432168421

If all the bits are set/on, you add the powers of 2, so for an 8 bit number like one octet in an IP address, 11111111, would result in: 27 + 2 6 + 2 5 + 2 4 + 2 3 + 2 2 + 2 1 + 2 0 = 255. Similar, 11000000 would result in 27 + 2 6 = 192
As mentioned, an IP address is made u of 4 of the octets of binary numbers, so 11000000.10101000.00000001.00001010 would be 192.168.1.10 in decimal.

So, with the basics of how a computer sees an IP address, we only scratched part of the communication over IP, net to the IP address, you will need a subnet mask. In a home network this is 255.255.255.0 As you can see 24 of the 32 bits are set, so the subnet mask is also revered to as /24

The subnet mask tells you which part of the address in this network is fixed, so in a home network this would be the 192.168.1 part. The last octet can have values of 0-255. The first value in this range -in this case 0- is called the subnet address, and the last number in this range -in this case 255- is called the broadcast address. These addresses are reserved and cannot be used as an IP address on your network. At a later point we might dive into this a bit deeper.

For now the most important part to remember is that in a home network in general you work with an IP range 192.168.x.y with subnet mask 255.255.255.0 In most home routers x is set to 1, but it can have any value from 0-255. Most routers have IP address 192.168.x.1, the other 253 addresses can be used for other devices on this network.

For a home network this should be plenty for all the devices you have there. In a company you would likely need more address. This can be done by changing the subnet mask and/or the network class. But that is something to deal with later. I will just mention the 3 private network classes and the default IP ranges and subnet masks:

classIP rangeSubnet maskHosts
C192.168.0.1-192.168.0.254
192.168.255.1-192.168.255.254
255.255.255.0254
B172.16.0.1-172.16.255.254
172.31.0.1-172.31.255.254
255.255.0.065534
A10.0.0.1-10.255.255.254255.0.0.016777214

Install a webserver

After we have practiced installing packages and editing files it is time to do a bit more practical setup. Let’s start with a webserver. As this is Linux, you have the choice of which webserver you want to install. The two biggest once are Apache2 and NGINX, but there are others like lighttpd. For now we keep with the first two. Before you continue type the internal IP address of the RPi in your web browser and double check the outcome. After that login to your Pi and install Apache2:

sudo apt install apache2

After the install is done, you can go to your web browser and try the internet IP address again. You should see something like the picture at the start of the article.

So, next let’s make our own webpage. By default Apache stores the pages used for the website in /var/www/html, so let’s make our own page:

sudo vi /var/www/html/index.html

Clear everything that is in this file and put in the following:

<html>
 <head>
  <title>Hello word</title>
 </head>
 <body>
  <h1>Hello world! This is Peter</h1>
 </body>
</html>

After you save this code, you can go back to your web browser and check the result.

As an alternative you can install nginx. Please note: Don’t install Apache2 and Nginx at the same time unless you know what you are doing. As they use the same port and have the same purpose they should not be competing for attention.

sudo apt install nginx

You will get a similar default page that tells you nginx has been installed correctly. After that you can follow the steps described above to make your personal website.

If you want to learn more about HTML, CSS, PHP, JavaScript and other weblanguage -which by themselves are an entire rabbithole- you can check w3schools. They have been giving some of the best tutorials on weblanguages I have come across.

Change hostname

As the Raspberry Pi standard comes with the name raspberrypi, you might want to change this to something more descriptive so if you have more than one Pi in your network, you know which one is which.

The process in easy, you just have to edit one file and reboot your Raspberry Pi.

sudo vi /etc/hostname

Here you can practice your vi skills, or you can change vi in the command for nano. As you see, there is one line in this file that reads raspberrypi. Change this to what you want the pi to be named, and save the document. Then type:

sudo reboot

After a little wait, you can login to your RPi again and you will see the name change has taken effect.

Duckdns (part 2)

With the knowledge we have gained in the previous lessons, we’ll now setup a script to make sure the IP address of your internet connections is automatically updated to DuckDNS so you can also access your Raspberry Pi when your provider decides to change your IP address.

For this we found a nice article during the third online lesson, which can be found here.

The short version is as follows:

mkdir duckdns
cd duckdns
nano duck.sh

enter the following line and edit both the domain (the part you choose before .duckdns.org) and the token (which you can find when you log into DuckDNS at the top.)

echo url="https://www.duckdns.org/update?domains=[YOUR_DOMAIN]&token=[YOUR_TOKEN]&ip=" | curl -k -o ~/duckdns/duck.log -K -

Than change the access rights to the file and edit crontab, which is a job scheduler that in this case run the script we just made every 5 minutes.

chmod 700 duck.sh
crontab -e

Add the following line at the bottom

*/5 * * * * ~/duckdns/duck.sh >/dev/null 2>&1

Than test the script, check the log and start cron so from now on you will not have to remember to update your IP address.

./duck.sh
cat duck.log
sudo service cron start

Edit a file

Back in the old days, the geek ‘holy war’ was between the two editors emacs and vi. For some reason I was introduced to vi and after I got the basics down, the only thing I have done was install the improved version, vim.

More recent a new contender entered the market. With Ubuntu straightening the road to Linux for the not so geeky users, there seemed to be a need for a friendlier editor: nano. I have little experience with the editor and still get confused when I edit something on the command line with it.

On Raspberry OS you will have access to both nano and vi by default, as I am more familiar with vi, I will show you this editor, if you prefer nano, be my guest. To me, one of the beauties of Linux is the freedom of choice. To make you navigation a bit more intuitive you might want to use apt to install vim

vi basics

CommandExplanation
vi <filename>Open a file for editing
<arrow keys>navigate through the document
iinsert mode, needed to edit the document
ESCnormal mode
:wwrite
:qexit (after saving or when no changes are made
:q!exit, discarding changes
uundo last change

Applications, the basics

Raspberry OS is part of the Debian linux family, so you can install applications and packages with the apt command. As this changes something on your system, you need to be either a privileged user or use the sudo command. Here is an example of a package install:

sudo atp install cmatrix

If it is a single package, the installer will automatically install it. If there are dependencies, you will first get an overview of what will be installed and you are asked to confirm. If you know you want to install the package plus dependencies you can use the -y argument after apt

Now the package has been installed you can run it by typing:

cmatrix

As you might find out, the package runs in the terminal and you do not have access to the terminal until you stop the package. This can be done by using the <ctrl/cmd>+<c> key combination.
To find out which options/arguments you can use running a program you can request the help option:

cmatrix --help or cmatrix -h

Here you get a quick overview of the arguments you can use to run the command. If the list is long you can scroll up by using <shift>+<PgUp/PgDn> (or your mouse).
If you want more information on how to use the command, you can also use the man command:

man cmatrix

Here you can scroll with the arrow up/down. To close the manual you press <q>

Now, let’s find out a bit more about the system we have installed. For this install neofetch and try to change the logo to the ubuntu logo:

sudo apt install neofetch

Connecting safer

Now that we can access our Pi from the internet, let’s turn up the safety a notch higher. We are going to setup SSH using a key pair, also known as public-key authentication.

In short, you create a key pair, you keep the private key on your local machine and copy the public key on the remote machine (the pi). The combination allows access. RSA is still the de facto key pair, developed in 1977, this is pretty impressive. More recently the use of ED25519 is coming up, which is not supported by older machines, but that issue we don’t have.

To generate a basic RSA key pair, you use the following command:

ssh-keygen

To generate a basic ED25519 key pair you user this command:

ssh-keygen -t ed25519

Default this will safe two files in the .ssh folder in your home directory. Remember a dot in front of a file- or folder name means it is hidden. For now we will not set a pass phrase, so you can just hit enter 3 times.

Next thing we need to copy the public key to our Raspberry Pi. For this we use the ssh-copy-id command:

ssh-copy-id -i ~/.ssh/<mykey>.pub pi@<ipaddress>

Here <mykey>.pub should be id_rsa.pub or id_ed25519.pub
After you have copied the public key you can try to ssh into your Pi. You’ll notice you don’t have to enter a password anymore.

It is a good practice to back up your public and private key pair in your password manager.

Where am I – Basic CLI

The Linux command line is powerful, but it might take a bit getting used to. In this lesson we start with some navigation and we’ll play with some files. Fun fact, a lot of these commands also work on the Mac command line.

In general when you login into a machine through SSH you’ll end up in the home directory of a user. In this case /home/pi but than. Here is a list of commands and a short explanation of their use.
Now that you have access to the command line, you can give them a try. We’ll get back to them later on in more detail.

CommandExplanation
lslist, show the content of the directory. Similar to dir in Windows
cdchange directory
clearclear the output on the screen
mkdirmake directory
rmdirremove empty directory
touchcreate file
rm remove file or not empty directory
cpcopy
mvmove
manmanual, works on all commands

When you are familiar with these basic commands, you can check out the following.

CommandExplanation
catdisplay content of a file
echoadd text to a file – compare > and >>
dfshow available/used disk space
du disk usage, show how the directory is build up
hostnameto find out the name of the machine
unamefind information about system, like distro, kernel, processor
sudosuper user do, in front of a command to have root privileges
aptdebian family packate manager
chmodchange access rights
chownchange owner/group
tar(un)pack tarball archives
unzipunpack zip archives

You can use your arrow keys (up and down) to go to to previous typed command, which saves typing.

Let’s start at the start

wiser.pepoweb.com was started to share my Linux knowledge with some coworkers. It is the central place to keep track of the lessons we create together.
We start with a Raspberry Pi 4 and raspbian and go from there.

So as there are enough manuals on the internet with a step by step how to on installing an OS on a Pi, I am not going to bore you with yet another write out. I’ll just list the steps to create a headless setup, so we don’t need additional hardware and wires, except for a network wire. If you need additional information you can follow the link at the bottom.

  • Download the Raspberry Pi imager from https://www.raspberrypi.com/software/
  • Run the imager on a computer with an SD card reader
    • Pick the OS you want to install (other light)
    • Pick the SD card you want to install it on
    • Press Write
      ! You can easily enable SSH by pressing Ctrl (Cmd) + Shift + x and enable SSH before hitting the Write button.
      ! Here you can also setup Wifi, if you are not using a wired connection.
  • Once done, create an empty file in the boot partition called ssh
  • Put the SD card in the Pi, connect it with a network cable to your router and power it up.
  • Get the IP address of the pi by one of these options:
    • ping raspberrypi.local
    • from the DHCP table in your router
    • A 3rd party tools to find out the IP
  • SSH into your Pi using: ssh pi@<ipaddress> the default password is raspberry

Welcome to the Linux command line 🙂

Now the first thing you want to do is change the default password. Type passwd and then enter the default password and two times a new password you create.