Duckdns (part 2)

With the knowledge we have gained in the previous lessons, we’ll now setup a script to make sure the IP address of your internet connections is automatically updated to DuckDNS so you can also access your Raspberry Pi when your provider decides to change your IP address.

For this we found a nice article during the third online lesson, which can be found here.

The short version is as follows:

mkdir duckdns
cd duckdns
nano duck.sh

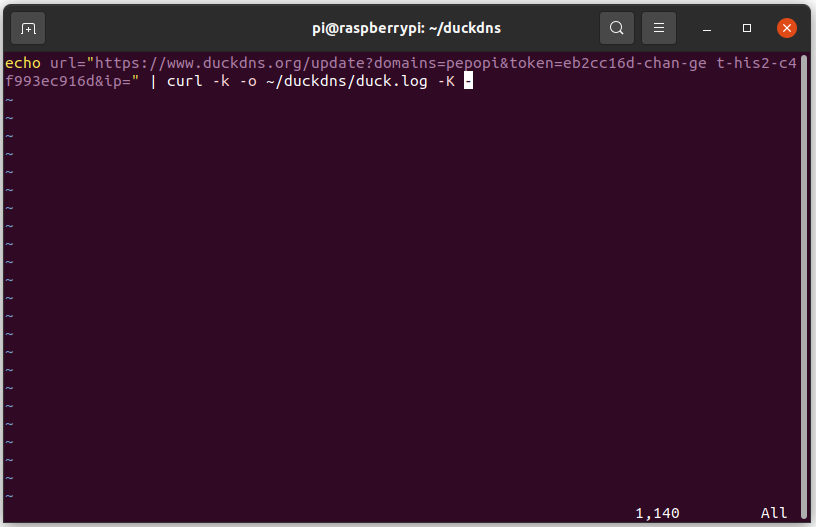
enter the following line and edit both the domain (the part you choose before .duckdns.org) and the token (which you can find when you log into DuckDNS at the top.)

echo url="https://www.duckdns.org/update?domains=[YOUR_DOMAIN]&token=[YOUR_TOKEN]&ip=" | curl -k -o ~/duckdns/duck.log -K -

Than change the access rights to the file and edit crontab, which is a job scheduler that in this case run the script we just made every 5 minutes.

chmod 700 duck.sh
crontab -e

Add the following line at the bottom

*/5 * * * * ~/duckdns/duck.sh >/dev/null 2>&1

Than test the script, check the log and start cron so from now on you will not have to remember to update your IP address.

./duck.sh
cat duck.log
sudo service cron start

Connecting safer

Now that we can access our Pi from the internet, let’s turn up the safety a notch higher. We are going to setup SSH using a key pair, also known as public-key authentication.

In short, you create a key pair, you keep the private key on your local machine and copy the public key on the remote machine (the pi). The combination allows access. RSA is still the de facto key pair, developed in 1977, this is pretty impressive. More recently the use of ED25519 is coming up, which is not supported by older machines, but that issue we don’t have.

To generate a basic RSA key pair, you use the following command:

ssh-keygen

To generate a basic ED25519 key pair you user this command:

ssh-keygen -t ed25519

Default this will safe two files in the .ssh folder in your home directory. Remember a dot in front of a file- or folder name means it is hidden. For now we will not set a pass phrase, so you can just hit enter 3 times.

Next thing we need to copy the public key to our Raspberry Pi. For this we use the ssh-copy-id command:

ssh-copy-id -i ~/.ssh/<mykey>.pub pi@<ipaddress>

Here <mykey>.pub should be id_rsa.pub or id_ed25519.pub
After you have copied the public key you can try to ssh into your Pi. You’ll notice you don’t have to enter a password anymore.

It is a good practice to back up your public and private key pair in your password manager.