After we have practiced installing packages and editing files it is time to do a bit more practical setup. Let’s start with a webserver. As this is Linux, you have the choice of which webserver you want to install. The two biggest once are Apache2 and NGINX, but there are others like lighttpd. For now we keep with the first two. Before you continue type the internal IP address of the RPi in your web browser and double check the outcome. After that login to your Pi and install Apache2:
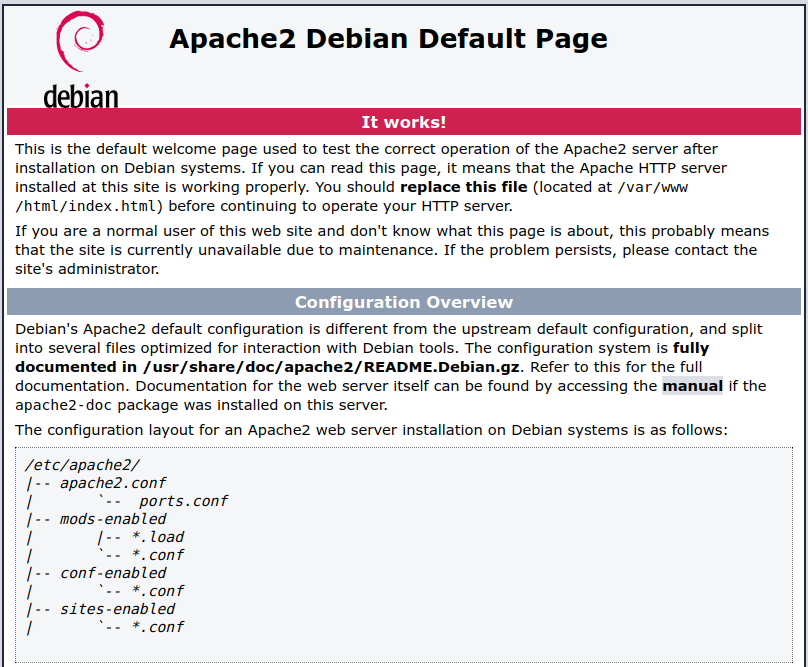
sudo apt install apache2After the install is done, you can go to your web browser and try the internet IP address again. You should see something like the picture at the start of the article.
So, next let’s make our own webpage. By default Apache stores the pages used for the website in /var/www/html, so let’s make our own page:
sudo vi /var/www/html/index.htmlClear everything that is in this file and put in the following:
<html>
 <head>
  <title>Hello word</title>
 </head>
 <body>
  <h1>Hello world! This is Peter</h1>
 </body>
</html>
After you save this code, you can go back to your web browser and check the result.
As an alternative you can install nginx. Please note: Don’t install Apache2 and Nginx at the same time unless you know what you are doing. As they use the same port and have the same purpose they should not be competing for attention.
sudo apt install nginxYou will get a similar default page that tells you nginx has been installed correctly. After that you can follow the steps described above to make your personal website.
If you want to learn more about HTML, CSS, PHP, JavaScript and other weblanguage -which by themselves are an entire rabbithole- you can check w3schools. They have been giving some of the best tutorials on weblanguages I have come across.